About Me

I am wife to my wonderful husband, mother to two adult children and Nana to one special granddaughter. I also share my heart and my home with several furbabies. Being creative doesn't come easily to me, but I love to try.
Bella Blinkie with Border
Powered by Blogger.

Wednesday, November 26, 2014

~Birthday Cards during Thanksgiving week

My son's girlfriend and my son-in-law have birthdays just before Thanksgiving.  I already knew what I wanted to do for my son-in-law, but the girlfriend wasn't even on the radar until my son called last week and said - "oh by the way Mom, in case you were thinking about making a card, she likes green and purple and tigers - and just nature in general".  hmmmmm - ok.   The green and the purple were easy.  Now how to incorporate a tiger into all that???  Winnie the Pooh to the rescue!  I started with a 4 x 6 card base and then made another layer out of lime green cardstock for on top at 3.5 x 5.5   I cut an oval into the center.  I cut a second piece of the same size from pattern paper and snipped off the top half and added to the green piece.  I zig zag stitched the seams.  I printed the sentiment on my Explore and embossed a couple of butterflies.  I lifted this layer from the purple (embossed) layer with foam squares.  Then I cut Tigger at 4" and lifted him above the top layer with foam dots.  They'll be here for Thanksgiving this year, so I really hope she likes it!


My son-in-law likes trains, so his card was a no-brainer.  After an unsuccessful search through the cricut carts for a suitable train, I turned to google and found this wonderful blog with digi stamps.  
Vintage Digi Stamps.  I think this vintage train is just awesome.  I did apply some filters in Photoshop before printing.  The card came together really quickly.  It is also a 6 x 4 base with a navy blue and coordinating pattern paper mat.  He really liked it.

Thanks for stopping by!


Friday, November 14, 2014

~Calling Card (ATC) Mini Album

When I got back from Mania 2014 in September, I stuffed all of the calling cards
I received into a ziploc bag so I wouldn't lose any.  I decided that I really needed a
way to showcase them and have them easily accessible so I could pull them out
and look at them.  They are AMAZING little pieces of artwork!  Anyway, I started
with a vertical paper bag mini album (you can find a tutorial starting here at My Sisters Scrapper).
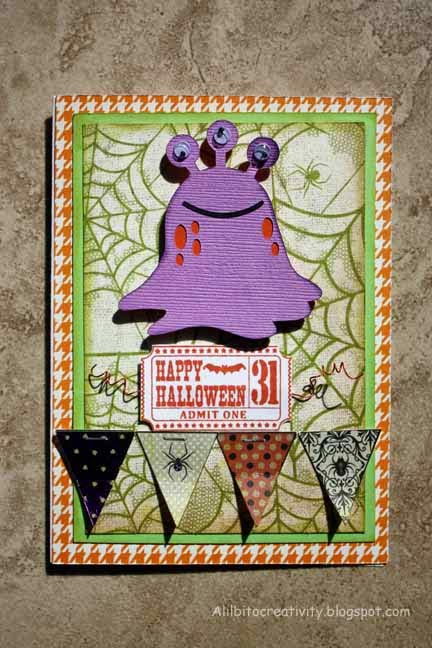
I went with a Halloween themed mini since Mania was Fall/Halloween themed.  I think
that made it come together much more quickly and ALSO put a BIG dent into my
Halloween paper stash.  Double bonus!

Then I designed both a vertical and horizontal waterfall to hold four ATCs each that
I placed on the OUTSIDE pages.  The INSIDE pages were reserved for the flat stuff
like pictures.  There are also some non 3x3 goodies I got and I put those on the oversized
tags that fit into the paper bags.  I even saved my place setting and Name badge!  I did
learn one lesson though.  Next time, instead of making the pages 3/8" apart, go with 5/8"
for calling cards.  Some of those little buggers have alot of dimension!  This book is stuffed!

So without further ado, here are all the pics.  And now maybe I can figure out what to do
with my 2012 Mania calling cards????


Monday, October 27, 2014

~4th Annual Canadian Swarm - Tag, You're It!

Over on the Cricut  Message board, our Canadian sisters are hosting their 4th annual swarm.  That means Challenges!!!  And Prizes!!!  I missed the first challenge (which I think was 6 cards), but did get in on the next one, hosted by the lovely Susan.  Her challenge was to make a tag, any tag.  She suggested fall themes, but did not restrict us.  We could also use any medium we wished.  I created two tags for this challenge.  One for fall and one for Christmas.  And of course, my tags would not be complete without inviting Tim Holtz and his inks along for the ride.  I used a tree from Spring Seasonal for the fall tag, along with a bit of lace and wooden heart.  The tag is a #8 Craft tag from Ranger, but when I did the Christmas tag, I remembered I had these really cool inventory tags that were the same size, so I used one of those.  I wish I could remember what kit I got them with, but the bag they are in has no markings.  Bummer.  Anyway, the tree on this one came from Joy of the Season, but I cut three, cut them apart and then re-layered them with pop dots.  I also added tinsel glitter to the edges. Making tags is fun because I get to play with my inks and stencils.  The hard part is deciding what to do with them when I'm finished!  Thanks for stopping by!


~Halloween Treat Bags + Banner

Wrapping up the Halloween crafting with some treat bags & a Halloween banner for Tacoah's 2nd grade classroom.  They have a parade each year, followed by a party in the classroom, so I thought a little decoration was in order (along with the treats!)   The treat bags were very similar to the ones I made for Mania.  I used the same cut from Autumn Celebration, but of course there was different candy inside and different washi tape outside.  I also added name tags for the kids using the Circle cart Charmed.


For the banner, I used Pretty Pennants and cut each at 5.5" high.  This way, I could get 4 pennants out of one sheet of 12x12 paper.  I cut the base pennants in black cardstock and then cut the overlay for each using pattern paper from 3 different Recollections stacks  The circles behind the letters were cut at 2.25" from the DCWV burlap stack.  The purple glitter paper was a summer clearance item from Joann's at 10 cents  a sheet and I used the new Lyrical Letters 2 for the font. :-)  I inked the edges of EVERYTHING!  Since I didn't want to punch holes in the pennants and really wanted it sturdy, I cut strips of chipboard the width of each banner and about 3/4" high.  Using my tiny attacher, I stapled the ribbon in between each piece and then glued them to to back upper edge of the pennants.  I covered the exposed chipboard/staple with black cardstock.  Its hard to tell in the pics, but I tied a small strip of alternating black and orange tulle between each pennant.

Here is the full banner.  Wish I had a wide angle lens.


Each pennant got an embellishment.  Some were cricut cuts, some were Recollections.  The spider in the center piece was made using a technique that Rockin Renee taught us an Mania.  Here are a few close ups and thanks for stopping by!


Hard to tell but the web was cut with black glitter paper.  Love the spider~he's made from beads!


~World Cardmaking Day Challenge

We had a challenge recently on the cricut message board by Sara to make a card.  For any occasion.  Any size.  Whatever you want.  Well of course being so close to Halloween, I (and many others) made Halloween cards!

Here are some of the cards I made for the challenge.  I confess I went a little overboard, but I have TONS of Halloween paper and in my defense, every one of these was mailed out!  I used Mini Monsters & Bump in the Night for most of these. 


This last one wasn't made for the challenge, but I posted it here because it fits.  This is  a box card I made for Jenny who is hosting our CC swap.  Of course by the time I had mailed it, I changed the black tulle to orange and swapped the green crinkle paper for black & orange.  Maybe this is why my cards are never really done!  Thanks for stopping by!


Tuesday, October 21, 2014

~Circle Mania 2014

Well summer is officially over, but I had the chance to enjoy a few more nice days by heading SOUTH to Alpharetta, GA in late September for the annual gathering of Cricut Lovers from everywhere hosted by Paulette from Around the Block with scrapalette.  It was an exciting weekend with over 50+ like-minded ladies and we also had a special guest in the form of the CEO of Cricut - Ashish Arora.  To prepare for the big event, I needed to make calling cards, treat bags, and of course a little hostess gift for Paulette!  That was my first time using G45 paper. I wish I had taken pictures of the sides, but if I did, I can't find them!  I also made a Thinking of You/Get Well card and suncatcher for the daughter of one of Paulette's friends. 

The franken-owl for my calling cards was one of the first svg purchases I made from MissKatesCuttables.  Halloween/Fall was the theme for the weekend.


Over the weekend, I had a chance to take a bunch of classes, but I think my favorite was to decorate a Christmas ornament with vinyl and transparencies.  This was taught by Susan at Croatian Crafter.  Check out my Photobucket Album of Circle Mania 2014.  That's it for now.  Next up will be Halloween cards I made for a World Cardmaking Day challenge on the message board.  Thanks for stopping by!


Friday, August 15, 2014

~The Cat IS the Hat

Dr. Seuss doesn't have anything on Tacoah!  His cat just wears a hat.  Our cat IS the hat.
Only Emma would allow her to wear her on her head like this.  What a goofy kid.
This layout was fun to do once I got started.  Thanks so much to Amy on the Cricut MB
for the ideas and giving me a DS file to get me started.  I used Don Juan, Disney Classics, Cricut Basic Shapes and Small Talk Frames and Tags.  Thanks for stopping by!

~Best Wishes/Pedaling On

A coworker recently announced that she would be leaving the company and moving on to work for the feds.  She and her husband are avid cyclists, so this is the card I came up with.  I wish I knew what cuts I used, but I didn't write them down and Design Space doesn't tell you that {yet?!?}
Thanks for stopping by!


Thursday, July 24, 2014

~Woodland Fairy Altered House & much, much more!

Today I was like a little kid at Christmas.  You see I got happy mail from my swap partner today!
I am in awe and amazed at what Nanci has created for me.  I adore the color palette she chose and I love everything she made!  She created tons of extra things (see my previous post on what the swap entailed) and I love it all!  Considering this was also her first swap, I think what she did is AMAZING! So without further ado, here are my swap gifts!  I warn you, I took a tons of pictures!!

The HOUSE
My woodland fairy house has a wood grain roof and fabric ivory woven throughout.  There are 3D mushrooms and flowers and my very own fairy out front! Butterflies flutter around the dormers.


The MINI
It will take me a long time to fill this up.  There are pockets and folders and tabs everywhere!  I love the mint green and peach papers!  There is even a mini charm on the spine. LOVE LOVE LOVE IT!


The Chunky Charm
All shapes and sizes of beads in predominantly mint green and rose colors.  It's just gorgeous!
There are word charms and fairies, a ballerina and dragonfly, a key and even a little house!


All the EXTRAS!
Nanci went above and beyond on this swap.  Besides the listed items, she made me a hand stitched and bound fairy journal, gorgeous color coordinated stick pins, tin pins and paper embellies for my mini PLUS tins pins and embellies for Tacoah.  She also made Tacoah her very own necklace!
If you are reading this Nanci, thank you from the bottom of my heart.  It has been so exciting having you as my swap partner and I love everything you created for me.  To everyone else - CONVINCE NANCI TO JOIN THE CIRCLE!!!  :-)  And thanks so much for stopping by!